
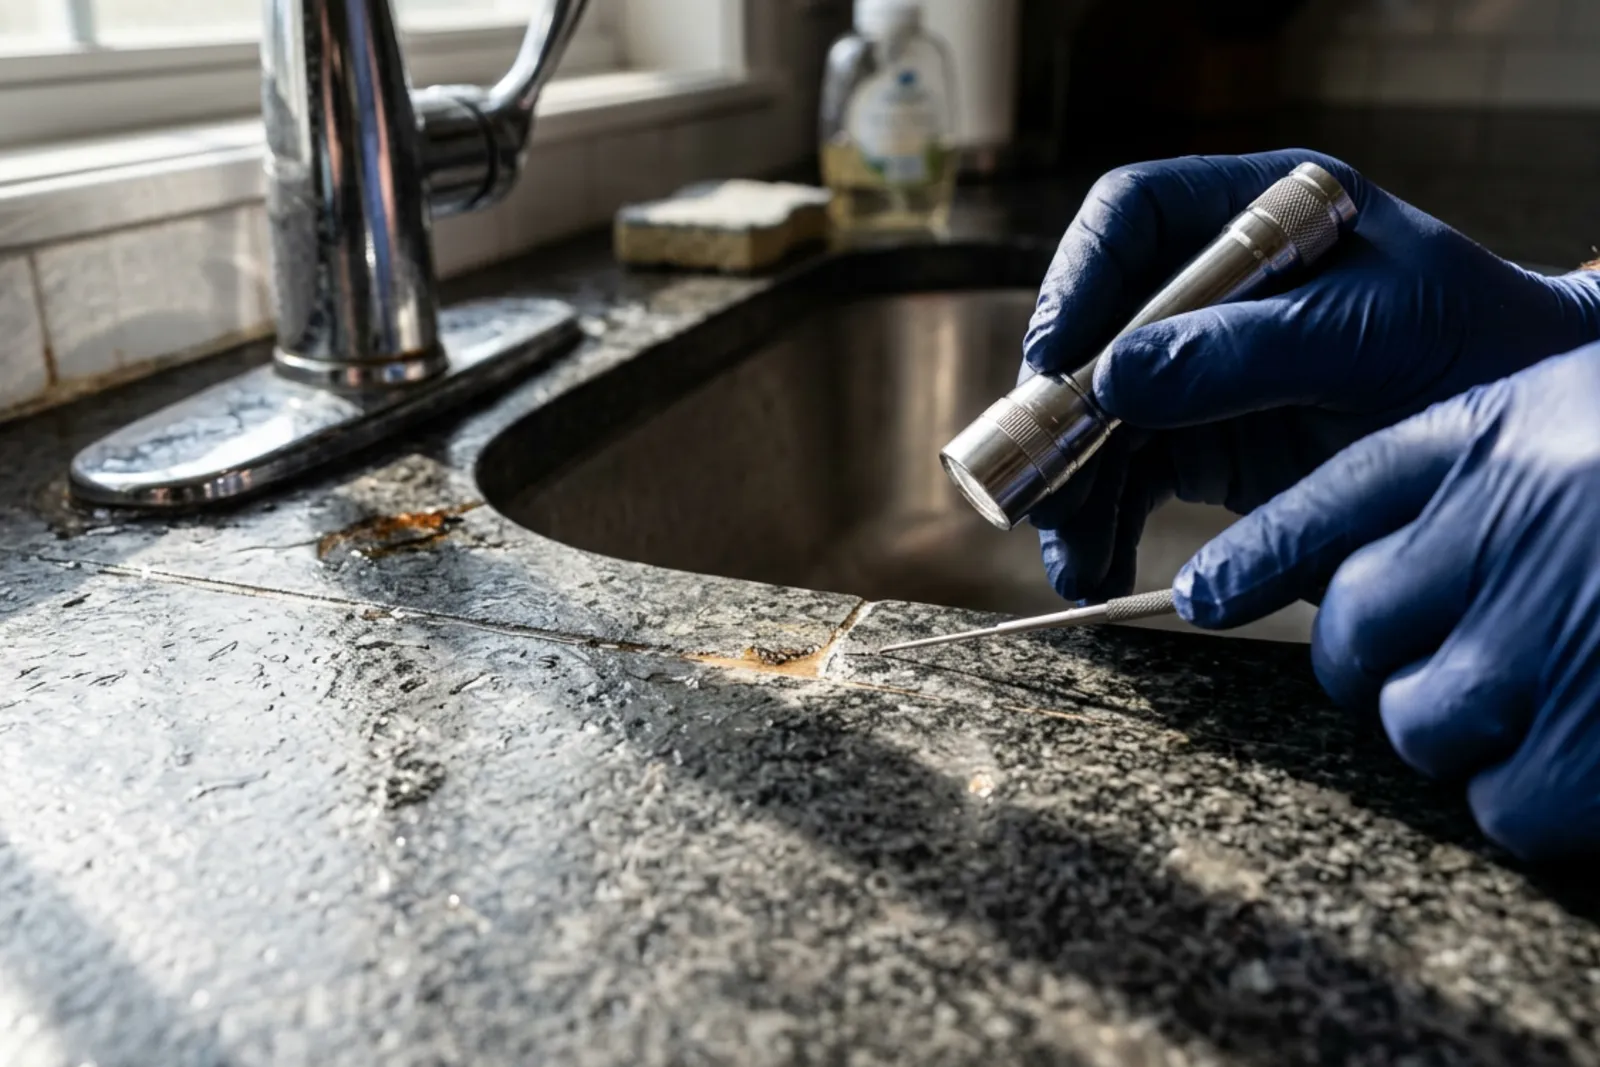
Is It Residue or Real Countertop Damage? A Homeowner’s Troubleshooting Guide
Learn how to tell residue from real countertop damage, identify common issues, and know when to call a professional. Protect your surfaces today.
September 28, 2026
A cloudy patch near the sink can look alarming. So can a faint white ring, a dull area around the coffee maker, or a tiny nick on the edge of a quartz countertop. The temptation is understandable: search for a repair kit, start scrubbing, or assume the countertop needs replacement.
Pause before doing any of those things.
Many countertop problems are cosmetic and removable. Others are genuine damage that calls for a skilled repair, especially when a crack, failed seam, or heat mark points to a deeper issue with support or installation. The difference matters. Cleaning residue as if it were a scratch wastes money. Trying to polish a factory-finished quartz surface can leave a larger, shinier, and more obvious patch than the original mark.
The first step is simple: identify what you are actually looking at.
Start With a Close Inspection
Clean the area gently before deciding it is damaged. Use warm water, a small amount of mild dish soap, and a soft microfiber cloth. Rinse away any cleaner, then dry the surface completely. Inspect it under strong side lighting, such as daylight from a window or a phone flashlight held at a low angle.
Then run clean, dry fingertips over the spot.
A raised, sticky, streaky, or uneven-feeling area often points to residue. A depression, rough patch, sharp edge, or line that catches a fingernail is more likely actual damage. This is not a perfect test, but it is a useful starting point.
Pay attention to location, too. Countertops tend to fail in predictable places:
Chips usually occur along exposed edges, corners, and sink cutouts where a pan or heavy object has struck the surface.
Haze and rings often appear near sinks, soap dispensers, dish racks, and coffee machines.
Scratches are common near prep zones when cutting boards are skipped.
Heat marks show up where hot cookware, baking sheets, slow cookers, or air fryer baskets have been placed directly on the slab.
Cracks and separated seams often occur around unsupported overhangs, cutouts, or joints between countertop sections.
That context tells a story. A white haze beside the sink has a very different likely cause than a sudden line running from a cooktop cutout to the edge of the countertop.
Why Cloudy Film Is Often Residue in Metro Vancouver
Water chemistry changes the likely diagnosis.
Much of Metro Vancouver receives very soft mountain reservoir water, with low hardness levels commonly around 2.5 to 4.8 mg/L. In practical terms, that means a cloudy film on countertops is often caused by soap, cleaning products, rinse aid, cooking oils, or hard-to-see residue left behind after wiping. Mineral buildup can happen, but it is less likely than in areas with hard groundwater.
Homes in the Fraser Valley, properties served by wells, and areas with higher-mineral water may see more mineral spotting. Those deposits can leave pale rings or crusty marks around faucets and sink edges. Even then, it is wise to identify the countertop material before reaching for a descaler or acidic cleaner.
Marble and other calcareous natural stones can react with acids. Vinegar, lemon-based cleaners, and many bathroom products can dull polished marble within minutes. A cleaning solution that works well on glass or ceramic tile may permanently alter a marble countertop.
If you suspect residue, work through this cautious sequence:
Wash with mild soap and water, rinse thoroughly, and dry with microfiber.
Try a countertop-safe, nonabrasive cleaner if the film remains.
Recheck the area once it is dry. Wet stone can temporarily hide dullness and scratches.
Stop if the surface looks etched, rough, or unchanged after cleaning.
Do not reach for abrasive pads, powdered scrubbers, steel wool, or aggressive polishing compounds. They can turn a small, uncertain mark into a visible dull patch.
Residue, Etching, Scratches, and Burns Do Not Look the Same
A countertop can appear “stained” when it is actually etched, scorched, scratched, or coated in residue. Each issue behaves differently.
Residue and Soap Film
Residue is usually cloudy, streaky, greasy, or ring-shaped. It may be especially noticeable on dark countertops, polished stone, and solid-colored quartz countertops. Dish soap, hand soap, cleaner overspray, dishwasher rinse aid, and oils can all leave a film.
The good news is that residue often responds to careful cleaning. If the surface looks normal after washing and drying, you have your answer. The countertop itself is likely fine.
Acid Etching on Marble
Etching is not a stain. It is a change in the stone’s surface caused by an acidic substance reacting with calcium carbonate in the marble.
Etched areas usually look duller than the surrounding finish. On polished marble countertops, they may resemble pale water spots or ghostly rings. They do not wipe off. They may feel slightly rough or less reflective than nearby areas.
Common causes include lemon juice, wine, vinegar, tomato sauce, citrus cleaners, and some bathroom products. Marble is beautiful, but it has a softer, more reactive personality than granite or quartz. A polished marble surface can often be re-honed and re-polished by a stone professional, though the repair needs to blend with the surrounding sheen.
Scratches
A scratch is a physical line in the surface. Light scratches may only affect the finish. Deeper scratches catch a fingernail or appear white because they scatter light.
Granite countertops can often be professionally buffed or re-polished, depending on the finish and depth of the scratch. Marble also responds well to professional honing and polishing. Light marks on marble may improve with a stone-specific polishing powder, but it is easy to alter the sheen unevenly, so this is one area where patience pays off.
Quartz countertops are less forgiving. Their finish is created during factory production and is difficult to reproduce on-site. Attempting to buff a deep scratch can create a glossy or dull spot that contrasts with the rest of the slab. For quartz, gentle cleaning is fine, but aggressive polishing is usually a bad bet.
Heat Damage and Scorching
Heat damage looks different depending on the material.
Granite handles heat better than most countertop materials, although “heat resistant” does not mean invulnerable. Sudden temperature changes can still stress stone or affect sealers. Light marks on granite may be repairable through professional honing or polishing.
Marble varies. It can tolerate normal kitchen use, but prolonged heat and thermal shock may leave marks or change the surface finish.
Quartz countertops contain natural quartz combined with resins and pigments. Those resins can scorch or discolor under concentrated heat. A hot pan, roasting tray, or electric appliance that traps heat against the surface may leave white, yellow, or brown discoloration. True resin scorch usually does not clean off, and it rarely polishes out convincingly.
Use trivets and hot pads every time. It is a boring recommendation, frankly, but it prevents one of the most frustrating kinds of countertop damage.
What a Chip Tells You About the Repair
Chips are common around sink openings, outside corners, and thin exposed edges. A dropped cast-iron pan or a hard blow from a glass bottle can take a small piece out of even a durable countertop.
A chip the size of a small fingernail may be a reasonable DIY project, particularly on granite countertops with a busy pattern. Color-matched epoxy kits can make a small defect far less noticeable. “Less noticeable” is the right goal. A repair may not disappear under direct light, especially on a solid white, black, or gray surface.
Quartz countertops can also be filled with color-matched epoxy, though matching is tougher than it sounds. Solid colors reveal slight changes in tone and sheen. Veined quartz requires a repairer to account for the background color, veining, and small flecks. A tiny repair can look surprisingly good, but only when the filler is properly tinted and shaped.
Marble chips can be filled as well. Because marble is often honed or polished after repair, an experienced professional may achieve a near-seamless result on a small chip.
Large chips, broken corners, and damage around a sink cutout are another category altogether. Thick filler tends to look bulky, collect grime, and fail under repeated impact. A professional may rebuild the edge, re-profile it, or recommend a localized replacement strategy. This is usually money better spent than repeating a DIY repair every few months.
Cracks and Separated Seams Need More Than Cosmetic Repair
A crack through a countertop slab is not just a surface blemish. Neither is a seam that has opened, sunk, or become uneven.
These problems often point to movement or stress beneath the countertop. Common causes include inadequate cabinet support, an uneven base, a poorly supported overhang, settlement, swollen wood substrates, or stress around a cooktop or sink cutout. In coastal areas with wet winters, moisture management matters. Wood components beneath bathroom surfaces and kitchen countertops need proper sealing because swelling can place pressure on seams and slabs.
A professional crack repair typically involves more than applying adhesive. The repairer needs to assess the cabinet structure, supports, leveling, and cutout reinforcement. If the underlying cause remains, the crack can reopen.
Seam repairs follow the same logic. The old adhesive may need to be removed, the countertop sections re-leveled, and the support corrected before new color-matched adhesive is applied. A well-repaired seam should sit flush and feel stable, even if a close inspection still reveals the joint.
Document the problem before anyone touches it. Take photos in good light, including wider photos that show the cabinet layout and any nearby appliances or cutouts. If the countertop is under a fabricator or installation warranty, contact that party before attempting a repair. DIY work can complicate a warranty claim, particularly where the issue may involve fabrication or countertop installation.
Material Matters More Than Most People Expect
The same mark can call for completely different treatment depending on the surface.
Quartz Countertops
Quartz is durable for day-to-day kitchen use, but it is not a material you can endlessly refinish. The factory finish is hard to duplicate on-site. Small chips may be filled, but deep scratches and burns often remain visible.
Avoid abrasive pads, harsh solvents, and direct heat. Use cutting boards, trivets, and cleaners approved for engineered stone. If a haze remains after gentle cleaning, get a professional assessment before trying polishing products.
Granite Countertops
Granite is hard, heat-tolerant, and often repairable. Its natural variation can hide a small chip repair remarkably well. Many scratches, light heat marks, and worn areas respond to professional honing and polishing.
Granite still benefits from reasonable care. Use a cutting board, wipe up spills, and maintain the sealer when water no longer beads on the surface. Sealer helps limit staining, but it does not prevent chips or make the stone acid-proof.
Marble Countertops
Marble develops wear more easily than granite or quartz, especially in active kitchens and bathroom surfaces. Scratches and etches are part of its reality. Some people love the softened, lived-in look. Others find every new mark distracting.
The upside is that marble can often be re-honed and re-polished. A dull etched area is frequently repairable, but matching the existing finish takes experience. If your marble has a honed finish, avoid trying to create a high polish in one small spot. That mismatch can be more noticeable than the etch.
Porcelain Countertops
Porcelain countertops are highly resistant to staining, scratching, and heat under normal conditions, but edges and corners can still chip if struck hard. Their dense, manufactured surface also means repair options depend heavily on the specific pattern, finish, and thickness.
A small edge chip may be filled by a professional, though the repair may remain faintly visible. Cracks, broken corners, or failures around cutouts should be assessed by someone familiar with porcelain fabrication. Thin porcelain slabs require careful support and handling.
When DIY Makes Sense, and When It Becomes a False Economy
There is nothing wrong with a careful DIY repair when the damage is small and the expectations are realistic. A minor chip on a patterned granite edge, for example, may improve substantially with a quality epoxy kit and some patience.
DIY is usually reasonable when:
The chip is small, stable, and away from a structural area.
The countertop is out of warranty.
The repair does not involve a crack, seam, sink cutout, or broken corner.
You are comfortable accepting an improvement rather than an invisible repair.
Call a professional when there is a crack, separated seam, deep quartz scratch, true heat scorch, major edge damage, or uncertainty about the cause. That is especially true if the countertop is new or may still have warranty coverage.
The cheapest repair is not always the one with the lowest initial price. A harsh polishing attempt on quartz, or a filler job applied over a moving crack, can make the final repair more difficult and expensive.
A Practical Decision Before You Spend Money
If you are unsure whether a mark is residue or damage, do this: clean it gently, dry it fully, inspect it under good light, and take clear photos. Include one close-up and one wider photo showing the surrounding countertop area.
Then ask a fabricator or stone repair professional a direct question: “Does this look like removable residue, surface damage, or a structural problem?”
A short conversation can save you from buying the wrong cleaner, using the wrong repair kit, or paying for work that does not address the real issue. Countertops are tough, but each material has limits. Knowing those limits is the best way to keep a minor mark from becoming an expensive repair.